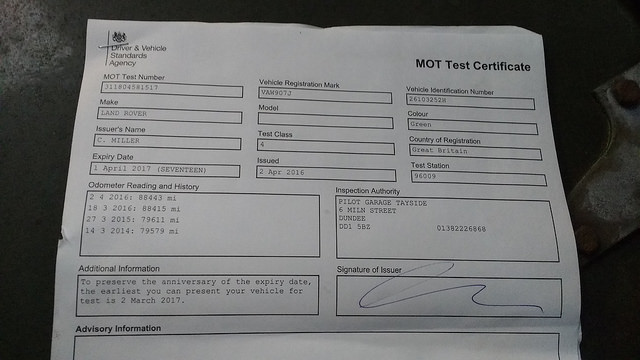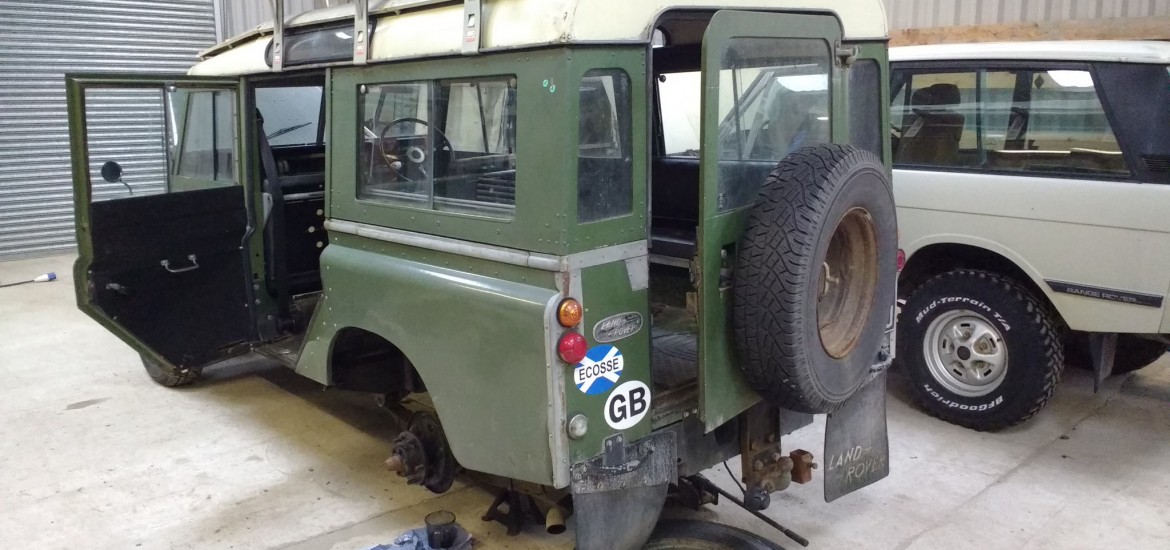
The 109 has been back on the road for a year now, so it’s MOT test time.
For a well-maintained Land Rover (rustbucket Discoveries (Discoverys?) excluded), there shouldn’t really be any issues come the MOT test.
A pre-MOT check is still a good idea, in case any niggles h ave arisen since the last check. I like using the MOT checklist (get one here), as it means I can go through the checks methodically and not forget anything. It’s a handy form any time, actually – it won’t catch specific Land Rover things to be checked, or basic maintenance like oils etc, but for general roadworthiness it’s a good set of checks to go through. The check itself is only as good as how thorough you are, but the form at least means you don’t forget anything obvious.
On this occasion I obviously wasn’t thorough enough, and the 109 was issued with a big, fat, fail. It was a fair cop, and one of the reasons I’m not a huge fan of MOT exemption for pre-1960 vehicles. I know the 109 pretty well, so it’s good to have a fresh pair of eyes that won’t unconsciously brush over things that they ‘know’ to be fine.
3 issues:
Leak from fuel system
Indicator visual tell-tail not working
Brake imbalance left-right
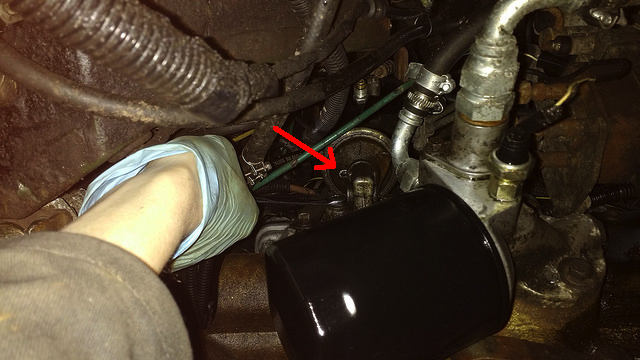 The leak from the fuel system was fairly easy to trace – there was diesel on the oil filter housing. The underside of the lift pump was also damp. There was no visible dripping, but with my finger held over the lift pump drain hole (arrowed) for a few minutes with the engine running there was a spot of diesel evident.
The fix – new lift pump.
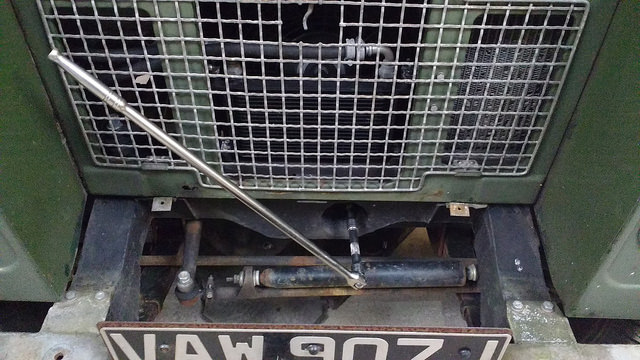 The lift pump is bolted to the block, with a lever sticking out on the inside (and a manual override on the outside). The lever riding up and down on the cam pumps fuel up to the injection pump from the tank. If the pump is removed while the lever is compressed, refitting is a lot more fiddly as you have to fight against the return spring. The job is made a lot less fiddly by sticking a 30 mm socket on the crank damper bolt and rotating the engine to find the point where the pump is fully extended. When at the correct position, the lever on the outside of the pump will
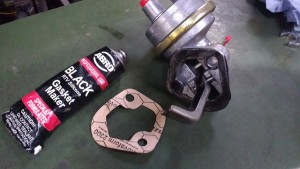 have resistance all the way through the stroke. If the internal lever is riding heavily on the cam, part of the external lever’s stroke will have no resistance. Incidentally, the external lever won’t work if the internal one is fully compressed by the cam – worth remembering if a manual prime is ever required.
I had known that the indicator tell-tale wasn’t flashing, but I had it on the post-MOT list to fix – I thought that the relay click was enough for the MOT. That’ll teach me.

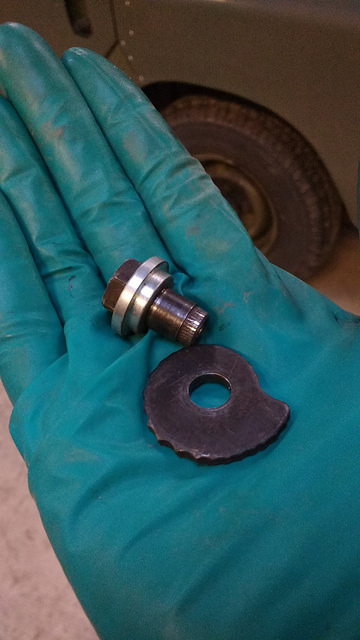
 Pre-series 3, the indicator visual telltale is a bulb in the tex magna unit attached to the steering column. I had assumed that the bulb in the tex magna had gone, but on stripping it the bulb and all wiring was fine.
It turned out that the indicator relay had gone. It’s a 3-pin type relay, used with the 5-wire tex-magna. The 3-pin relays have a dedicated terminal to run the tell-tale, and that terminal wasn’t operational on this one. There is a 4 wire type of tex magna which runs the telltale on the same circuit as the indicators. I checked the ones on my other series’ and they were all the 5-wire type, so I assume the 4 wire type is for very early vehicles.
Replacing the relay wasn’t the end of the world, as I had a period Lucas one going spare. Mmmm, vintage.
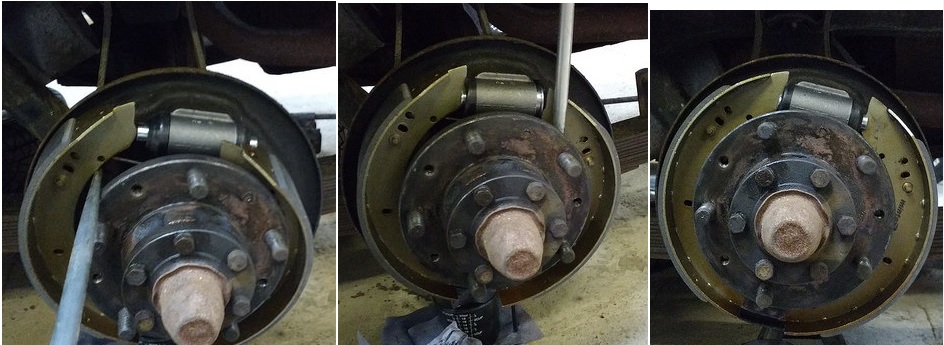
The braking issue was a surprise, as they were well-adjusted and I hadn’t noticed any issues. That said, my driving style means I don’t brake very often, and never really brake heavily.
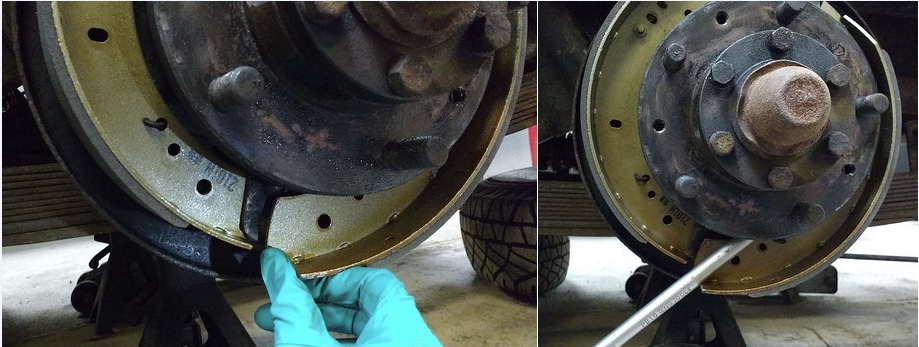
The most likely candidate for swerving under heavy braking was contaminated pads on one half of an axle. This can be caused by a leak of EP90 from the axle casing or DOT fluid from the brakes. Provided they’ve not been on for ages, it’s a quick enough check to whip the drums off and have a look-see at what’s going on. If they have been on a while, it might be necessary to back the adjusters off to clear any wear lip on the drums. If the drums are corroded to the hub and still don’t shift, there’s a 3/8-16 UN threaded hole in the drum to jack off (lol, etc.) the drum from the hub.

This time the issue was a brake system leak, from the nearside rear wheel cylinder. I hadn’t noticed it, as it wasn’t yet bad enough to be visible outside the drum.

A pair of new wheel cylinders for the rear axle sorted that out (if one is on the way out, I’d rather replace them as a pair).
 While everything was in bits, I replaced the adjusters as they were looking a bit tired. This turned out to be a mistake – the only adjusters I could get hold of were Britpart, and they were completely pants. The adjusters are a snail cam that sits on a pin through the brake backplate. The cam stops the shoe from retracting too far. On these Britpart replacements, the pin is splined and is an interference fit with a plain hole in the snail cam. This would be fine, were the spline material capable of deforming the snail cam, thus creating an interference-fit female spline. It wasn’t though – the splines were pretty much removed by the snail cam without any deformation of the plain hole.
Only once the brakes were reassembled and wouldn’t adjust properly was this obvious. This is why I buy genuine parts whenever possible – I spent hours faffing about to make these things work.
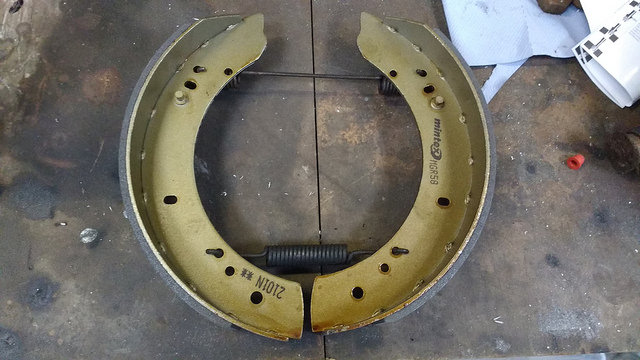
The contaminated shoes got launched and replaced, again as an axle pair.
Interestingly, one of the adjuster pins (these rest on the snail cams) had worked loose on the old shoes. They’ve only been on for a year/7000 ish miles, so I wasn’t very impressed. They were Mintex shoes, so I’ll be keeping a close eye on the new shoes (also Mintex).

The setup is different on these to the 88″ rear brakes, as both ends of both springs are connected to the shoes:
With the right technique fitting these is a quick job. I put them round the hub with the top shoe spring disconnected at one end, then connect it back up again.
With the shoes around the hub and the springs connected, I fit each shoe in turn to the anchor point at the bottom, then fit each shoe to the piston up top.
Weapon of choice for seating the shoes is the trusty 16″ heel bar, one of the most versatile tools out there.
With the adjusters backed off, the drums and wheels got fired back on, brakes bled and adjusted and we were good to go.